How to Set Up an Ice Bath at Home
(Step-by-Step for Any Budget)
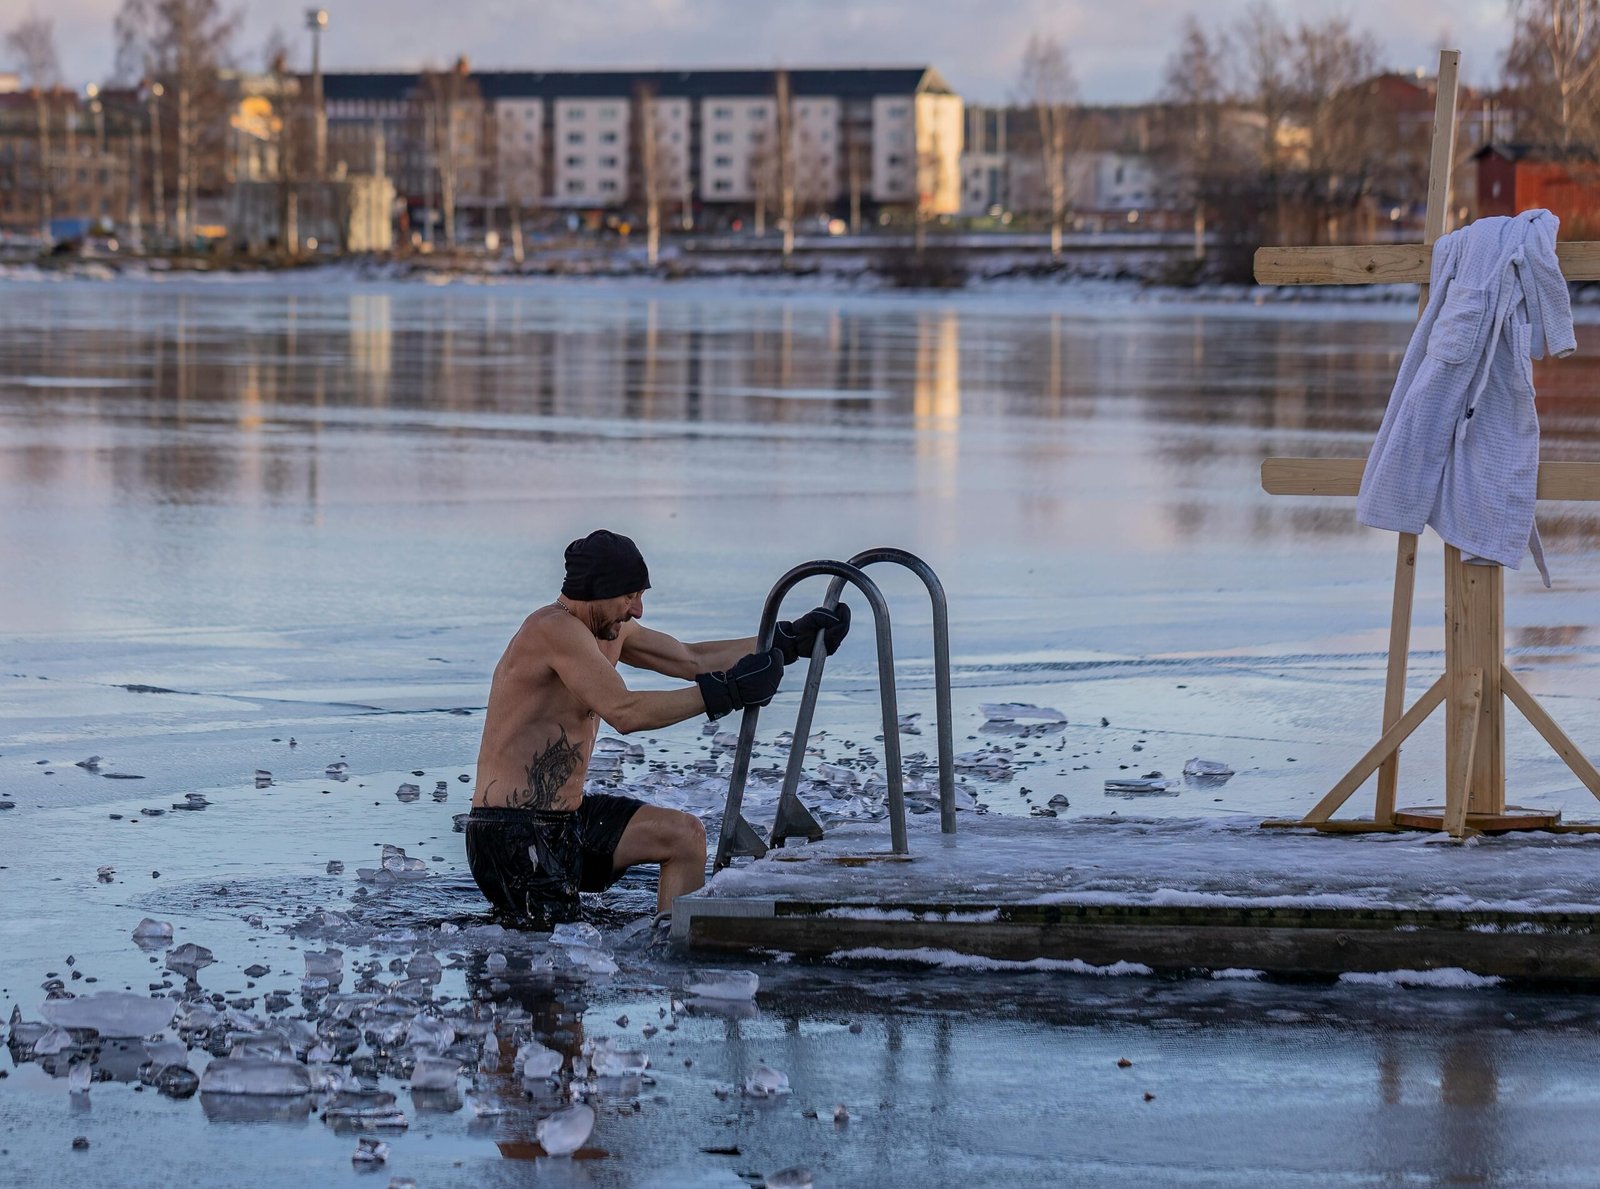
Cold water therapy doesn’t need to cost thousands. If you’re an athlete looking to recover faster, reduce inflammation, or build mental toughness, you can build an effective home ice bath setup — no matter your budget.
In this guide, we’ll break down:
- What you actually need to get started
- How to choose the right tub for your size and goals
- How much ice you’ll need
- Safety tips and practical setup hacks
- Affordable vs. premium ice bath setups
Why Cold Plunges Are Worth It
Cold exposure triggers powerful physiological changes:
- Reduces post-training inflammation
- Speeds up muscle recovery
- Improves circulation
- Builds mental resilience
- May support better sleep and stress control
And it doesn’t take much: just a few minutes in 50°F (10°C) water a few times a week has been shown to have measurable recovery and mood-boosting effects. But for it to work long-term, your setup needs to be easy, repeatable, and sustainable.
Let’s get into how to make that happen.
Step 1: Choose the Right Ice Bath Tub
For the most informative Selections, check out our post on which ice baths were think are best
Here are your best options — ranked by budget:
Low Budget: Inflatable or Foldable Ice Tubs (~$60–$150)
These are Amazon’s bestsellers for a reason. Brands like Jasonwell or Cold Pod offer insulated, collapsible tubs that hold 80–120 gallons of water and stay cold for a decent period. (We have review of both of those)
- Pros: Affordable, lightweight, easy to store
- Cons: Less durable, can sag or leak over time
- Best for: New users or athletes with limited space
Mid-Range: Rigid or XL Tubs (~$150–$300)
Options like Bubplay or deeper barrel tubs offer more structure, better insulation, and more room for bigger athletes.
- Pros: Sturdier, easier to fill/enter, better cold retention
- Cons: More expensive, larger footprint
- Best for: Consistent users, larger builds
Premium: Insulated Chiller Tubs ($1,000+)
These units use active cooling systems and don’t require daily ice. Popular among pro athletes, but often overkill for casual users.
- Pros: No ice needed, precise temperature control
- Cons: Very expensive, requires maintenance
- Best for: Elite athletes or serious long-term users
Rule of Thumb: Start small and upgrade only if your routine becomes consistent. A simple tub and ice is all most people need to get 90% of the benefits.
Step 2: Where to Set It Up
You’ll want a flat, drainable surface with some privacy and protection from the wind. Popular spots include:
| Location | Pros | Cons |
|---|---|---|
| Backyard/Patio | Drain-friendly, open space | May need a cover for bugs/leaves |
| Garage | Protected, stable temps | Requires a drain or floor mat |
| Bathroom | Easiest cleanup, no drainage worries | Tight fit for larger tubs |
| Balcony | Good air exposure, space-efficient | Weight/load concerns on some floors |
Tip: Always put down a non-slip mat underneath and check your drainage plan before filling.
Step 3: Fill It — and Ice It Right
Water First, Ice Second
Fill your tub 75–90% of the way with cold tap water. Then add ice. You’ll need:
| Desired Temp | Ice Needed (in summer) |
|---|---|
| ~60°F | 20–30 lbs |
| ~50°F | 40–60 lbs |
| ~40°F | 80–100+ lbs |
You can use:
- Gas station ice (cheapest per pound)
- Grocery store party bags
- Ice machines (for serious daily plungers)
Pro Hack: Keep a large chest freezer full of gallon jugs. Freeze them and reuse for each plunge — saves money And time.
Step 4: Time Your Plunge Right
Cold exposure can boost recovery or hinder growth depending on when you do it.
- For recovery: Post-workout plunges can reduce soreness and inflammation
- For growth: Avoid plunging immediately after heavy lifting — wait 4–6 hours or save for off-days
- For energy/mood: Morning plunges increase norepinephrine and alertness
Beginner Schedule:
- 2–3 plunges per week
- 2–5 minutes per session
- Start at 60°F and work down to 45°F over time
Coach’s Note: Always listen to your body. If your breath locks up or you start shivering uncontrollably, it’s time to get out.
Step 5: Don’t Skip These Safety Essentials
Cold plunging is safe if done correctly. Here’s what to always keep in mind:
Stay in control of your breath.
Start with deep nasal breathing. Never hyperventilate before entering.
Know your limit.
It’s not about going numb. 2–3 minutes is plenty for benefits.
Don’t go alone if it’s your first time.
Have someone nearby or tell someone before you plunge.
Avoid if you have heart issues, blood pressure sensitivity, or are pregnant.
Always check with a doctor first.
Warm up gradually afterward.
Use movement, not hot showers, to reheat slowly and naturally. this will also provide benefits to the bodys metabolism and brown fat store
Suggested Gear Checklist (Optional but Helpful)
Check out our post on Cold Plunge Accessories That Actually Help (And Which Ones to Skip).
| Item | Use |
|---|---|
| Digital Thermometer | Monitor water temperature accurately |
| Waterproof Timer | Track plunge time without holding your phone |
| Insulated Lid or Cover | Keep your water clean and cold between uses |
| Floor Mat | Prevent slipping and protect surfaces |
| Changing Mat or Towel | Get dry and warm fast after plunging |
Recap: Your Budget Cold Plunge Setup
If you’re building a starter ice bath setup for under $150:
- Foldable tub (like Jasonwell or Cold Pod)
- 40–60 lbs of ice per plunge (or just freeze some milk jugs full of water)
- Water thermometer and floor mat
- Done in under 15 minutes
If you’re going all-in with better insulation and comfort:
- Rigid XL tub (like Bubplay)
- Insulated cover + reusable ice jugs
- Routine 3x/week plunging
You don’t need a $3,000 cold plunge to feel the difference. With smart setup and a few repeatable habits, you can make cold water recovery a powerful tool in your training arsenal.
Built by athletes. Tested for recovery.
– The Strongroom Team
If you found this post to be helpful, then you may be interested in the rest of our blog page here.
Discover more from GearAffiliate
Subscribe to get the latest posts sent to your email.
1 thought on “How to Set Up an Ice Bath at Home (Step-by-Step for Any Budget)”
Comments are closed.